
Näitä tarvitset / You will need
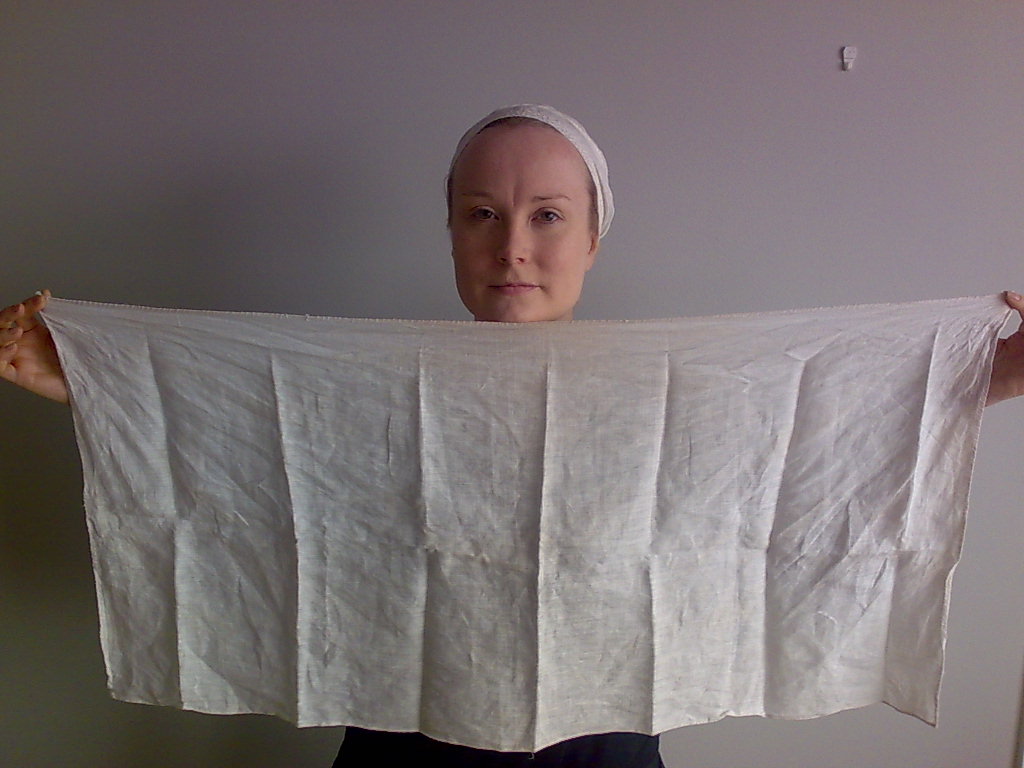
- Huntu (esim. 90×90cm neliö)
- leukaliina (esim. 60x 90 cm suorakaide) ohuesta pellavasta.
Hunnun ja leukaliinan mittoja voi muutella oman makunsa mukaan, mutta on kannattavaa tehdä hunnusta ennemmin liian iso kuin pieni. Huntumateriaalina pellava on erinomainen. Se kestää hyvin pesemistä eikä ole liukas. Sopivan ohutta pellavaa voi kuitenkin olla vaikea löytää. Omat huntupellavani on ostettu enimmäkseen Tallinnasta. Kun sitä löytää, ohutta pellavaa kannattaa ostaa aina kerralla paljon.
- A veil (a 90x90cm square)
- wimple (a 60×90 rectangle) made of very thin linen.
Feel free to adjust the dimensions of your veil and wimple. However, it makes sense to make them rather big than small. I like linen as a veil material. It’s durable, extremely washable and not slippery. A suitable thin linen can be a challenge to find. Mine are mostly from Tallinn in Estonia. Whenever I find a good fabric, I tend to buy lots at one time.

- Neuloja. (Tähän tyyliin tarvitaan 2 pidempää ja 3 lyhyttä neulaa.)
Huntu pysyy päässä ja paikoillaan neulojen avulla. Parhaita huntuneuloja ovat tähän tarkoitukseen valmistetut keskiaikaisten neulojen replikat. Huntuneuloissa on eroja ja käyttäjillä erilaisia makuja niiden suhteen. Itse pidän eniten messinkisistä, noin viisisenttisistä ja mahdollisimman terävistä neuloista. Huntuneuloja on hyvä olla eri mittaisia eri tarkoitusten varalta. Neuloja löytyy useimmilta keskiaikatavaroiden kauppiailta.
Mikäli replikoita ei löydy, huntuneuloina toimivat myös nuppineulat, varsinkin tavallista paksummat ja pidemmät neulat.
- Veil pins (This style requires 2 longer pins and 3 shorter ones)
The secret to successful wearing of veils is in the veil pins. I prefer veil pin replicas, which are made for just this purpose. I like my pins to be around 5 cm, brass and quite sharp. A selection of sizes and lenghts is good to have for different styles. If you cannot find proper replica pins, sewing pins will work, especially ones that are slightly longer. Â

- Myssy (tai huivi tai hiusverkko)
Hunnun pukemisessa on tärkeintä, että on hyvä ja tukeva perusta, jolle huntukokonaisuuden rakentaa. On oltava jotain, johon hunnun saa neuloilla kiinnitettyä. Hyvä perusta on esimerkiksi myssy, riittävän napakasti päähän sidottu huivi tai vaikkapa hiusverkko.
- Letit (ei välttämätön, mutta kiva)
Jos haluaa olla 1300-luvun muodin orja, voi pukea huntunsa alle letit. Jos omat hiukset eivät riitä, voi turvautua tekoletteihin. Oma lisäkkeeni on pellavaa ja tehty Lontoosta löydetyn lettilisäkkeen mallin mukaan, joskin alkuperäisen silkkilautanauhan olen korvannut villasta tehdyllä putkilolla.
- A Cap (or a scarf or something)
An important thing to have is something to pin the entire headress on. A cap ala St. Bridget is really really good for this purpose, but in the absence of such a thing, a small scarf or anything else tied snugly around your head will do.
- Braids (not necessary, but nice)
For those who want to be fashionable in the fourteenth century, a little hairpiece with cornettes always adds to the outfit. (For more on this hairpiece, look here. ) The hairpiece in these pictures is very simple to make, since I skipped the tabletweaving part and attached the braids to a tube made out of wool. Those with more hair can naturally pull off this look with their own hair.

Hunnun pukeminen / Putting on the veil
1) Perusta / Setting the foundation
Ensin luodaan tukeva pohja: sidotaan myssy tai huivi päähän, laitetaan tarvittaessa hiukset kiinni ja näkymättömiin. Otetaan korvakorut pois. Pyhän Birgitan myssy on erinomainen pohja.
First off, create a sturdy foundation for your headdress. Put your hair (including your fringe) into the cap, braiding or tying if necessary. Remove earrings. I cannot recommend a St. Bridget cap enough, as it is ideal for this. Tie the cap on snugly.

2) Leukaliinan pukeminen / the Wimple
Otetaan leukaliina esiin. Vetää vakavaksi, kun se on kurtussa.
Take out your wimple. Cringe at the wrinkles (never mind, the wrinkles usually settle as you wear it.)
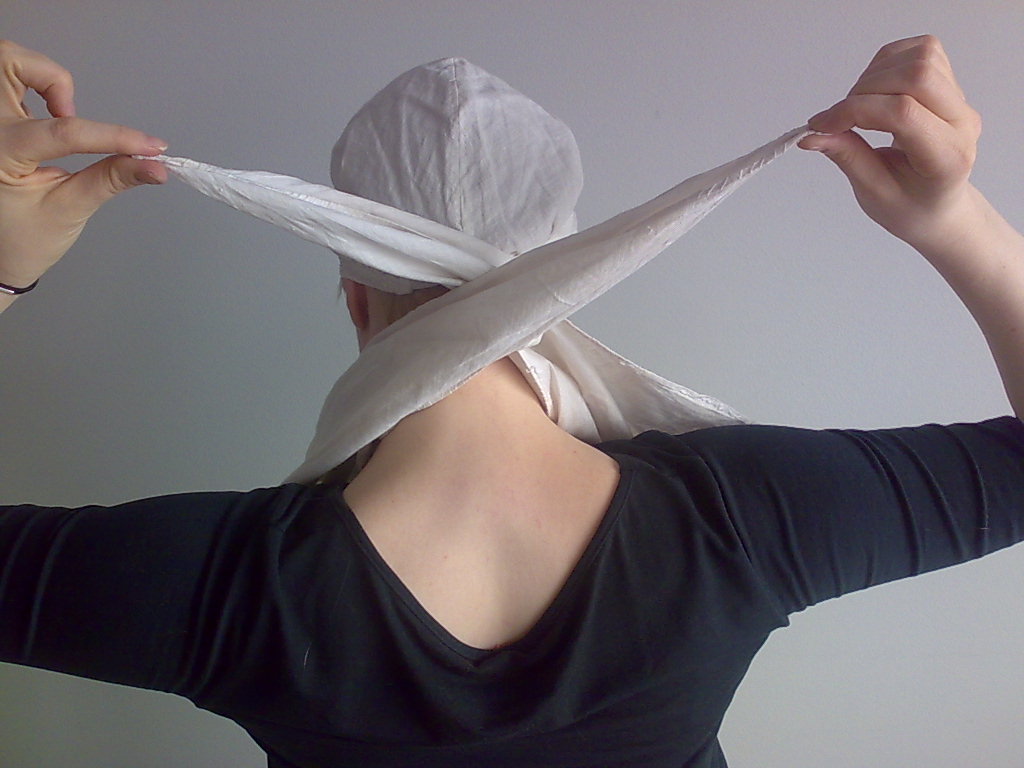
Leukaliinan päät laitetaan niskasta ristiin.
Cross the ends of the wimple at the nape of your neck.
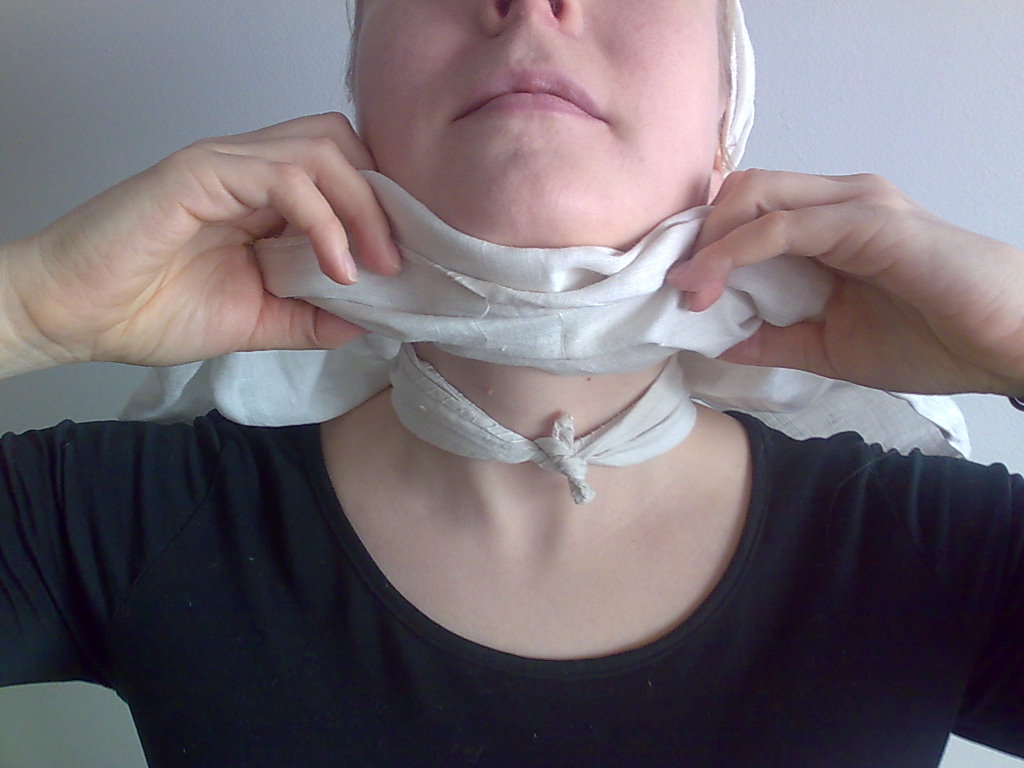
Leukaliinan päät solmitaan leuan alle eteen niin, että solmut jäävät liinan alle. Liinaa ei tarvitse solmia ahdistavan tiukalle, vaan se voi olla mukavan löysä.
Wrap the wimple around your neck, tie the ends at the front, under your chin. Don’t pull it too tight, feel free to leave it loose and comfortable. The knot is hidden under the rest of the wimple.Â
Leukaliina on valmiina:
Finished wimple:
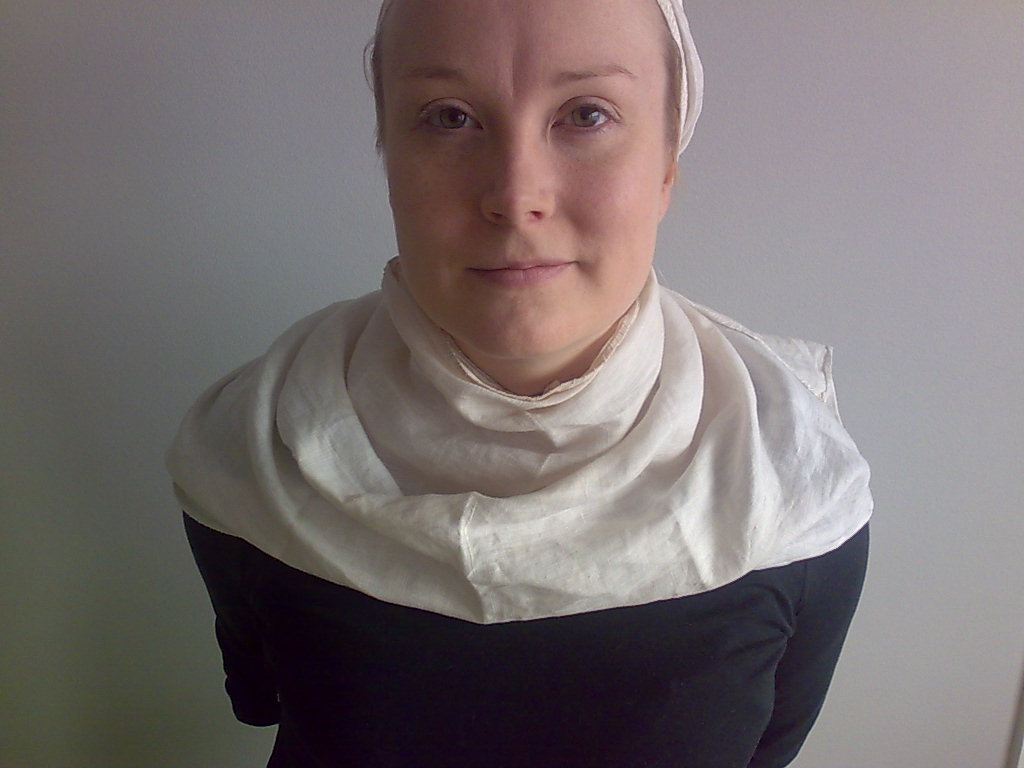
Leukaliinan helman voi siistiä asettelemalla sen mekon kauluksen sisään.
You can finish off by setting the edge into your neckline.
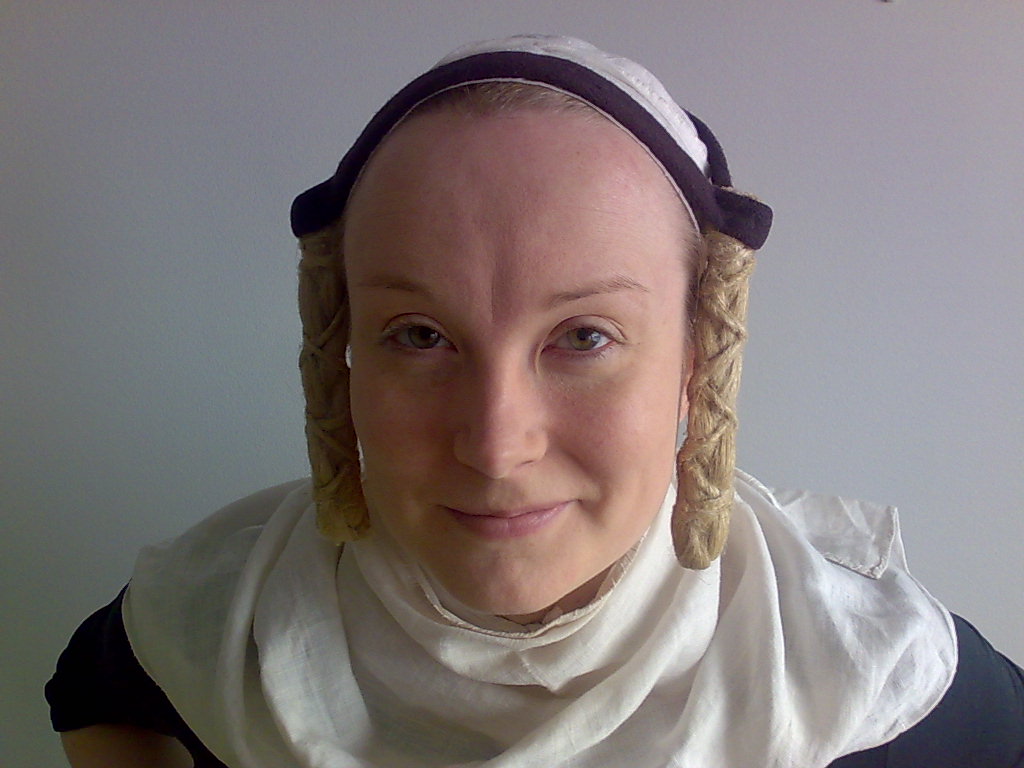
3) Letit / Cornettes
(Jos ei halua lettejä, tämän kohdan voi skipata.) Letit asetellaan roikkumaan tasaisesti kasvojen molemmille puolille. En vielä tässä vaiheessa kiinnitä lettejä, vaan niiden oma paino pitää ne sopivasti paikoillaan. Asettelen lettien pannan pois otsalta, niin ettei se näy hunnun alta. Lisää leteistä ja niiden tekemisestä on tässä .
(If you don’t want to have braids, feel free to skip this part) Set the braids evenly on both sides of your face. I won’t attach the braids just now, but leave them hanging, as their weight keeps them in place. I lift the band off my forehead, so that it will not show under my veil. See more on the cornettes here.
4) Huntu / the Veil
Huntu taitetaan sopivan kokoiseksi, niin että se roikkuu selässä haluamallasi korkeudella. Sen voi taittaa kaksinkerroin tai lähes kaksinkerroin, koosta riippuen. (Koska huntua voi taitella, kannattaa aina ennemmin tehdä liian iso kuin pieni huntu!) Taittaminen helpottaa hunnun etureunan asettelua.
Hunnun pituudelle ei ole yleispätevää mittaa. Jokainen löytänee itselleen sopivan. Ohjenuorana voi pitää sitä, että niska ei saisi näkyä ja huntu jonka päälle on istua on epäkäytännöllinen.
Fold the veil so that it is of a desirable lenght. Depending on the size, you can fold just 10 cm at the front or fold the veil in half. The fold makes it easier to adjust the veil at the front. Because folding the veil makes sense, it is important to make the veil big enough to bo folded.
The lenght if the veil is a matter of personal taste. A good guideline is that your neck should not show and a veil you can sit on is very impractical.

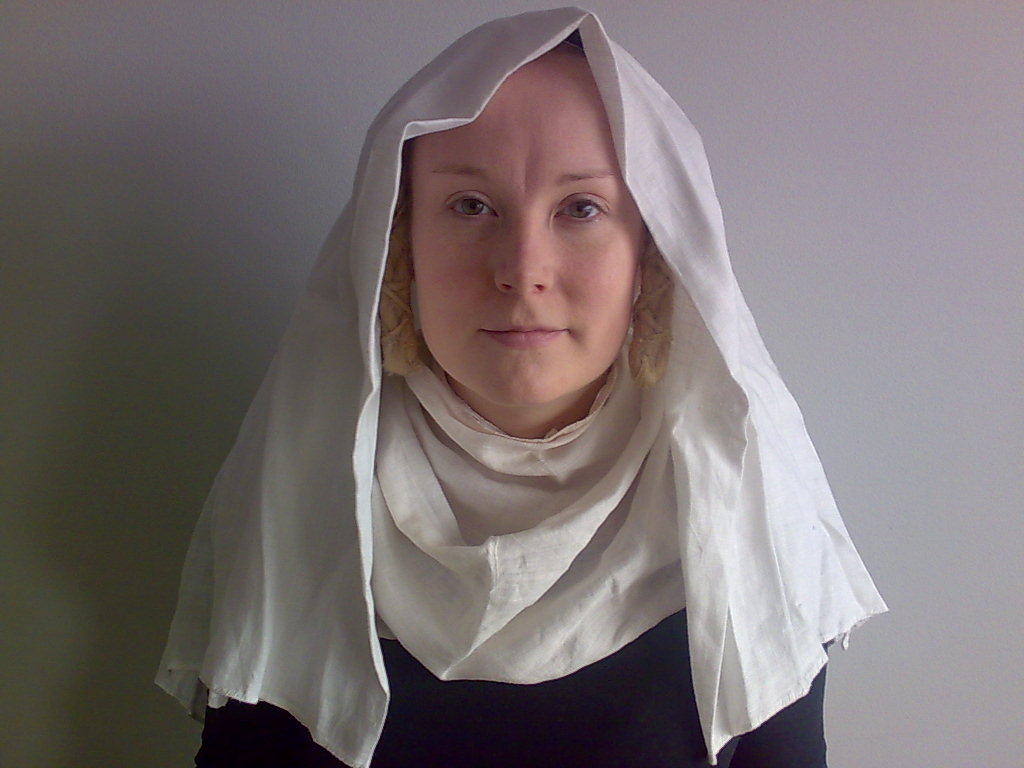
Huntu asetellaan päähän, mahdollisimman tasaisesti niin, että kasvojen molemmille puolille jää roikkumaan yhtä paljon kangasta. Kuvasta näkyy, ettei tämä vielä riitä. Huntu pitää kiinnittää.
Set the veil on your head, as evenly as possible so that the ends sit evenly on both sides of the face. As you can see in the picture, this is not quite enough. You have to attach the veil.
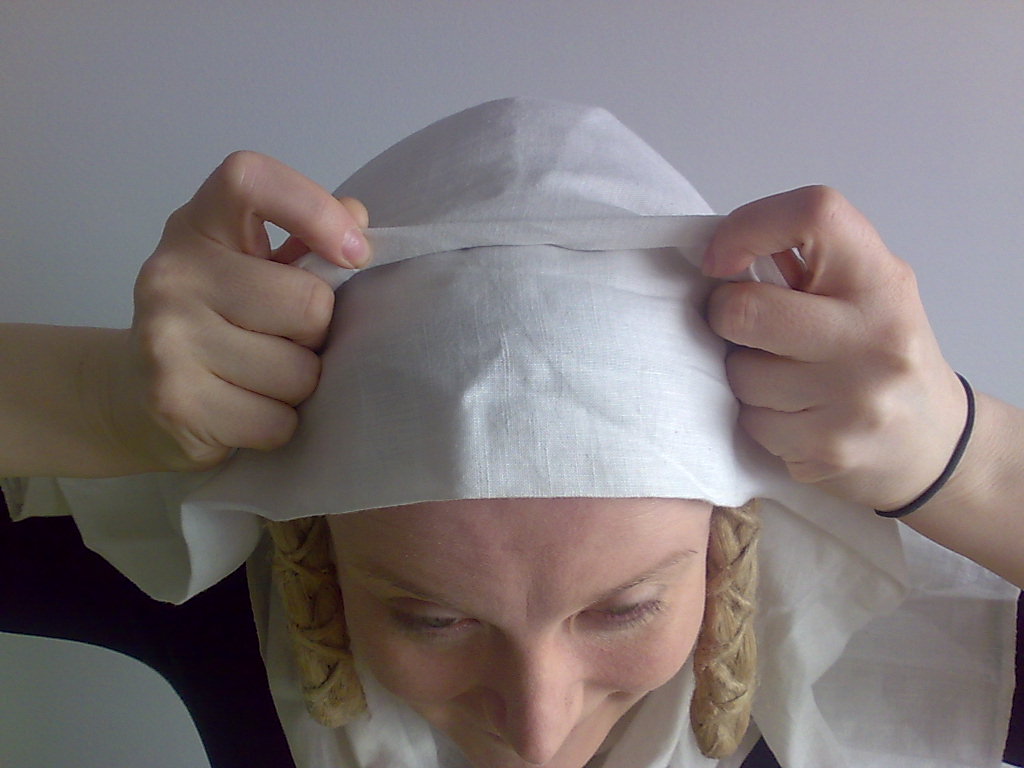
Seuraavaksi nipistetään päälaelta pieni taite, joka kulkee lettien yläpäiden kohdalta.
The next step is to pinch a little fold at the top of your head, so that the fold is approximately at the top ends of the braids.
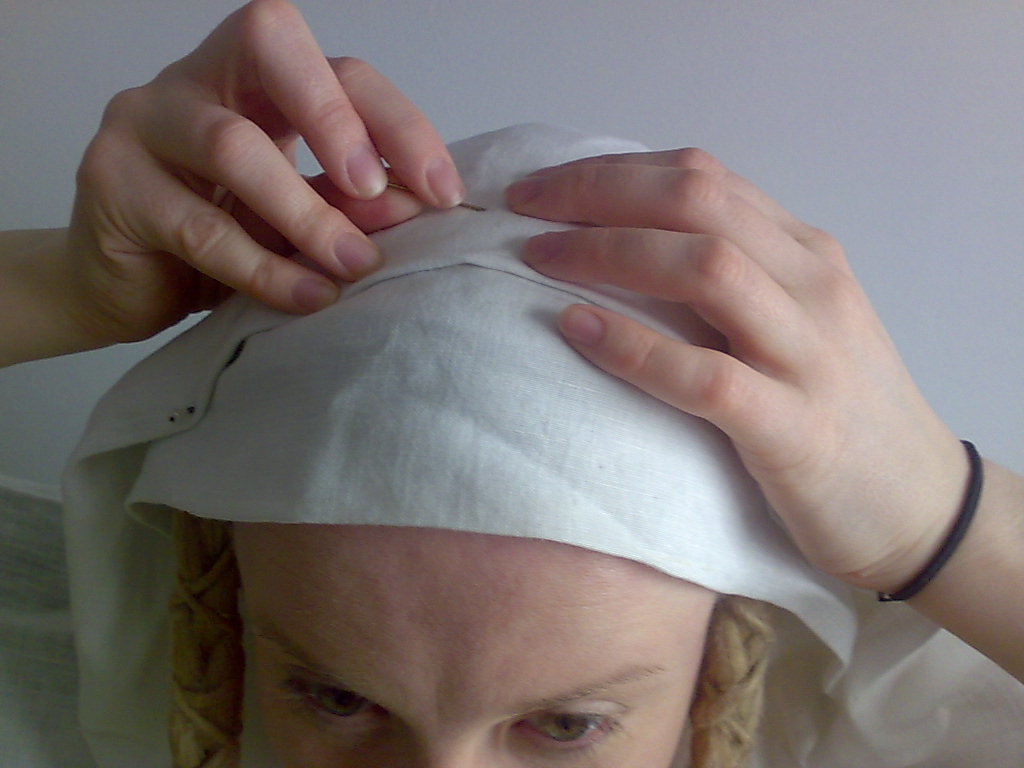
Kiinnitetään neulavalikoiman pisimmillä neuloilla (n. 9cm) huntu molemmilta puolilta. Neulan pitäisi läpäistä taitettu huntu, letti ja kiinnittyä vielä myssyyn. Neulan pää voi jäädä hunnun sisään.
Attach the veil with the long pins (mine are about 9 cm) on both sides. The pin should go through the folded veil, the braid and also attach itself to the cap. Leave the end of the pin inside the veil.

Pyhä Birgittakin kehotti luostariohjesäännössään kiinnittämään hunnun myös päälaelta. Seuraavaksi laitetaan kolmas neula (jonka ei tarvitse olla pitkä) päälaelle taitteen päälle. Neula pistetään läpi hunnusta ja myssystä.
Even St. Bridget thought it was a good idea to add a pin to the top of your head. Place the pin on top of the fold, pin it through the veil AND the cap.
Nyt huntu on paikoillaan, mutta pienikin tuuli saa sen vielä lepattamaan liikaa sivuilta. Viimeiseksi kiinnitetään siis huntu leukaliinaan. Sen jälkeen se pysyy päässä, vaikka roikkuisi pää alaspäin.
Now the veil is in place (see below), but it still is too floppy on the sides. So the last thing we need to do is fasten the veil to the wimple. After this it will stay put even if you’d hang upside down or headhang. (I know.)

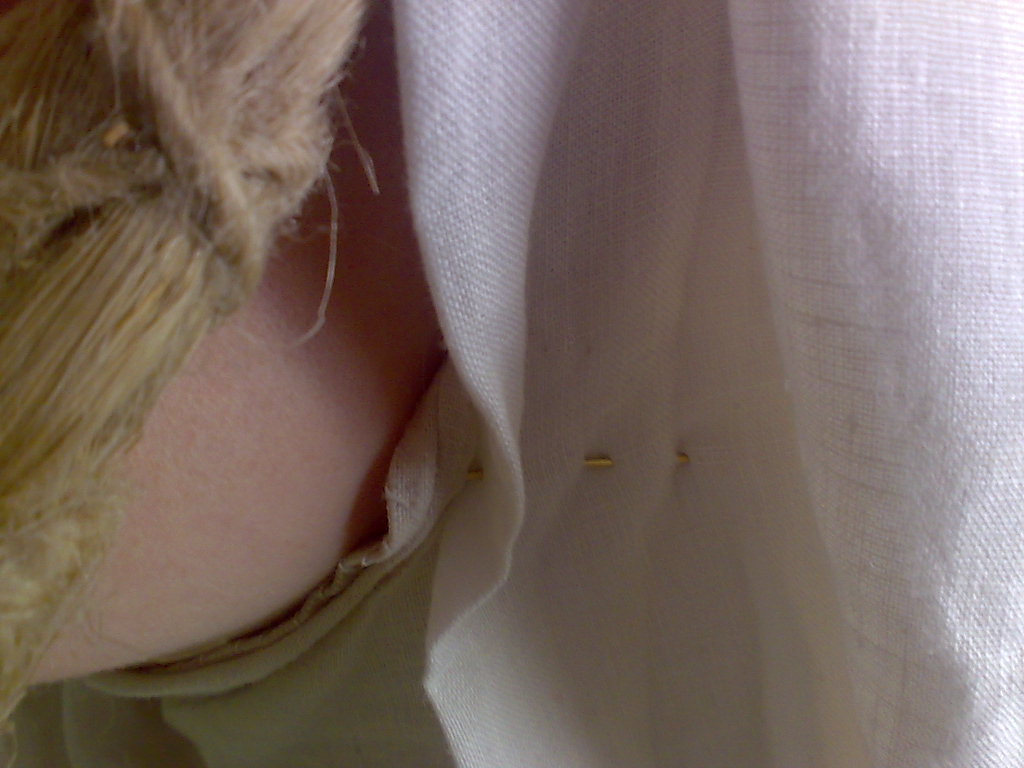
Huntu kiinnitetään leukaliinaan laittamalla neula leukaliinan sisäpuolelta läpi hunnun alimman eli kasvoja lähinnä olevan kerroksen läpi. (Toivottavasti kuva selventää asiaa. Klikkaa kuvia isommaksi.)
The veil is attached to the wimple by putting a pin through from the inside of the wimple and attaching it to the innermost layer/fold of the veil. (This is hard to explain, but hopefully the picture will make this clearer.)
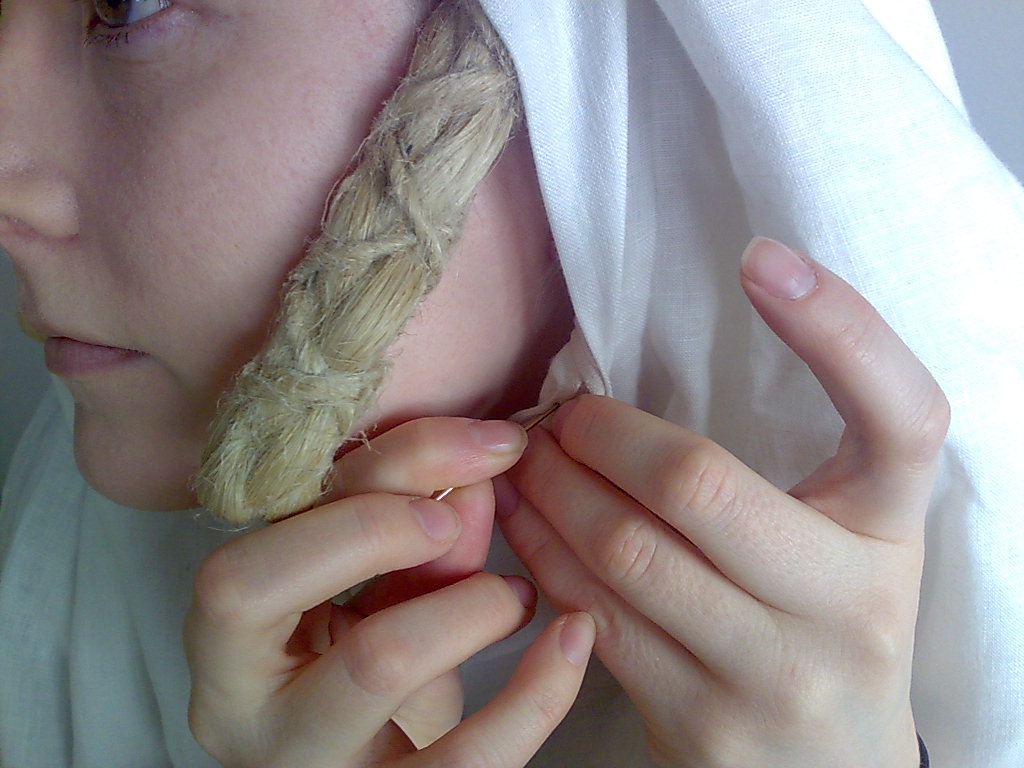
Neula jää lähes näkymättömiin, kokonaan sisäpuolelle.
This way the needle stays nearly invisible, almost hidden.
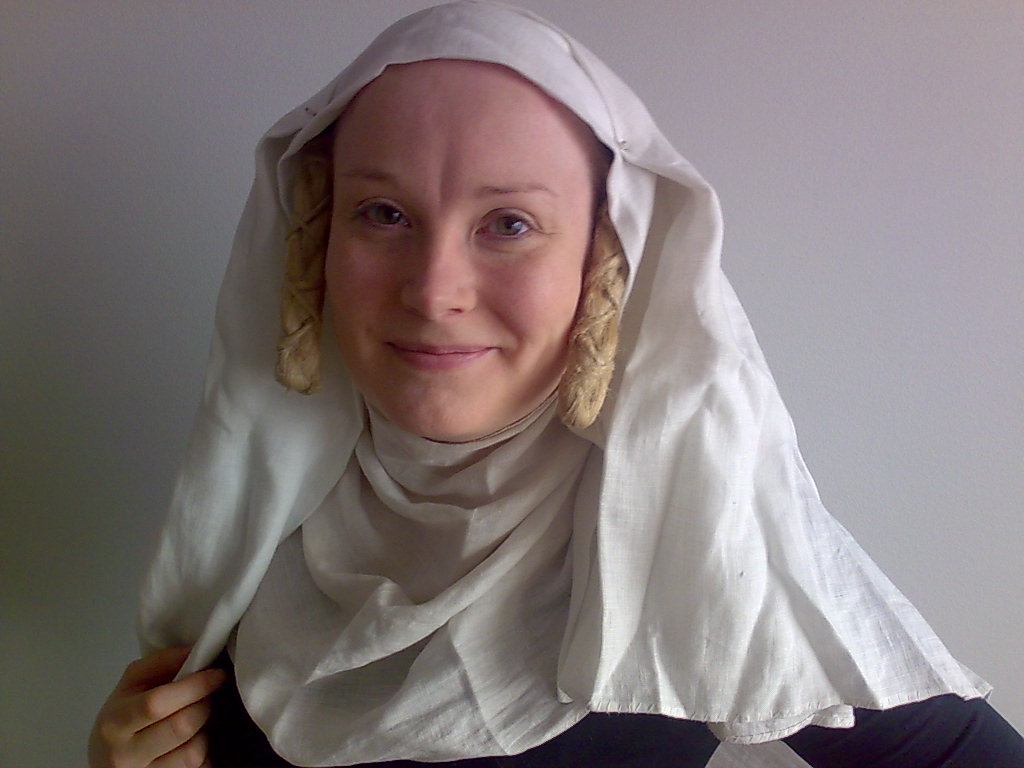
5) Valmis! / Finished!
Takaisin huntusivulle / Back to the page on veils

Great tutorial :)
Did you make your St. Bridget cap? I really need to make myself one of those.
cheers
Adrielle
I’m glad you liked it! I made my cap and I think they are the very best thing to wear under a veil. It’s a nice little project (if you skip the lace seam).
I made the cap and the cornettes by copying you and I must say this looks really nice with my 14th century dress. Would the cap have been worn alone ever or always covered by a veil? How late do you think these were popular? I’ve got some early 15th century dresses as well and I think this would look pretty good with them.
Hei – kiitos selkeistä hienoista neuvoista! Olemme menossa huomenna (1.9.2012) keskiaikaisiin pitoihin Pirkanmaan musiikkiopistolle ja uskalsin näillä neuvoilla yrittää vuokra-asun viimeistelyä huivilla. Ajattelin siksakata huivin reunat tiheällä siksakilla – kuinka reuna tulisi oikeisti huolitella? Aivan samanlaista päähineestä ei tullut mutta mielestäni varsin uskottava kuitenkin ;) Mutta ennen kaikkea kiitos – varsinkin kankaan mitoista oli erinomaista apua.
Vähän kutkuttaa, josko tekisin oman puvun seuraavaksi. Lapsille on tehty jos jonkinlaista tragonipukua – ehkä nyt äidin vuoro =)
T; Heli
Hieno juttu, että ohjeista oli hyötyä! (ja oma puku kannattaa ehdottomasti tehdä, jos multa kysytään :)) Hunnun reunan voi päärmätä monella tapaa – helppo tapa on kiinnittää käännetty reuna pikkiiikkisin luotospiston – ohuemmat hunnut (mikäli yhten keskiaikaiseen silkkikappaleeseen on uskominen) on taas hyvä kääntää rullapäärmäämällä. Se vaatii kovasti sorminäppäryyttä eikä ole kovinkaan mukavaa, mutta reunasta tulee tietenkin kiva. Pistoista on hyvä artikkeli täällä: http://www.keskiaika.org/kirjasto/pistot/pistot.htm
Thank you for this amazing tutorial! Seeing the steps you took and the finished image has been very helpful. :)